When you choose Common Ground, you are entering a relationship built on trust, openness and honesty.
Our goal is your complete satisfaction. Our process includes providing you with a Step-by-Step Preview of the actions needed to create your new pool.
Below is an example of the information we provide to all of our customers, prior to beginning any work.
Step-by-Step Preview
EXCAVATION
This is the big day, so don’t miss it! That hole in the ground is about to begin. Don’t forget what we said earlier about your having to approve, in writing, the layout of your pool.
Now is the time, too, to caution you about two things: 1. Don’t let anyone touch or move the stakes, strings or other markers forming the layout of your pool. These markers are critical to the shape, elevation and placement of the pool. 2. Once the hole is dug, keep your distance from it, and be especially mindful that your children remain safely away. The sides may have a tendency to crumble and could present a safety hazard unless you are vigilant.
Our experienced people will take caution to minimize demolition but, by necessity, there will be some damage to any existing grass, shrubs, etc. that are in the path of the wheelbarrow. We usually use rubber-tired “Bobcats” to do the digging, but we are may be doing a hand dig for your project. If so, this will mean numerous trips by wheelbarrow and we could leave marks on the driveway. If you have any favorite plants that you want to save, be sure to arrange for their transplanting before the dig date.
Please turn off and permanently disable sprinkler zones in the pool dig areas. One-week prior to excavation or if you are in a new tract, saturate the pool areas. These actions will reduce damage to existing landscape, reduce dust and generally improve the conditions for construction.
Some areas that need to be identified that Common Ground Swimming Pools cannot control include: EASEMENTS – UNIDENTIFIED PROPERTY LINES – UTILITY LINES OR OTHER UNKNOWN OBJECTS BELOW THE GROUND SURFACE. If there is a potential problem, we need to know about it before beginning the excavation.
The demo and excavation process will usually be accomplished in one- two weeks, depending on how much demolition is required before digging.
Projects where soils reports are required will have a post-dig soils inspection called at this time.
Homeowner:
- Do no touch or move stake for pool layout
- Disable sprinkler zones in access and dig areas
- Move favorite plants
- Identify any unmarked lines
- Keep your distance from the hole
STEEL
Steel reinforcing bars are installed as a skeleton for the pool shell. This is a necessity for the structural strength of your pool. A one-two day operation.
PLUMBING
This operation includes the installation of all equipment, plumbing and gas lines. While installing the gas lines for the heater it may be necessary to turn off your house gas supply. We will re-light your pilots if you are home. If not, the plumber will leave a note on your door. It’s still a good idea to check your hot water when you know the plumber has been around – just in case!
The plumber uses a heavy-duty trenching machine to get to the required depth and cannot be responsible for unidentified lines or objects under the ground surface. If you know of any potential obstructions in the plumbing path, please make them known and/or arrange for their disposition. As a courtesy, they will reconnect sprinkler lines if they are easily defined and they have compatible supplies on their truck. Otherwise, sprinkler line repairs are your responsibility. Plumbing is usually a two-three day operation.
This is also a good time for you to call the gas company to check your meter for size to accommodate your pool heater. They will want to know the size of your heater. This information is on your contract and you can always call the office.
Homeowner:
- Check hot water – verify pilot light is lit
- Call Gas Company to check meter size
- Mark any known underground lines or objects before plumber begins trenching
ELECTRIC
All underground conduits are placed from your electric panel to the equipment fixtures and controls. The wire is usually pulled at a later time, one-two days.
After plumbing and electrical are in, an inspection is called for pre-Gunite.
GUNITE
This is the loudest operation of them all. If you are the lucky one to be the first job of the day, the sand truck will drop his load in the street around five am. Then around six the rest of the artillery pulls up to get ready for the salvo to begin at seven.
The is also the first time that you get to participate. Besides paying the invoice, your get to water the freshly concreted pool. Start watering the day after Gunite; morning and evening, then follow up for ten days with a good soaking two or three times per day – depending on how hot the weather is. Don’t be afraid to get too much water on it, especially around the top edges, seats, steps, etc. A little water in the bottom is OK, just don’t make the masons and tile guys have to wear scuba gear!
Homeowner:
- Payment due
- Water fro 10 days, twice a day
- Make sure you have your tile choice
- Determined your pebble color
- Decided on your concrete color
MASONRY
All brick work. This phase usually takes the longest to complete - anywhere from a couple of days to a month or more, depending on the scope of work. Changes during this process can cause big delays.
There are usually one or two payments due during this phase.
CONCRETE DECKS AND DRAINS
Finally, no more dirt, mud and dust! There are a couple of things you need to be aware of regarding the curing process, to avoid scratches. The concrete will cure enough to walk on in one day, but keep the surface clear of debris, pots, hoses, etc., for at least two weeks; otherwise that outline may be there permanently. Concrete does not always cure out at a perfectly even rate, which may cause an uneven surface color.
We also take precautions on how and when we pour. We pre-soak the ground and build in crack control joints at all the critical points, but surface checks and cracks may still appear – it’s something that we cannot guarantee against.
Total time for grading, installing drains, forming and pouring the concrete may take a week but the pouring is usually done in one day.
Proper drainage is essential for maintaining stability of the decks and your total property area. We will provide for drainage of the decks and get the water away from the pool
Another payment is probably due.
TILE
All times are applied in one to two days. This selection must be made as early as possible to insure stock.
FENCE-GATES-CLEANUP
The door alarms need to be installed and gates swinging out, not in, prior to pre-plaster inspections.
ANY PROBLEMS?
Now is the time when the superintendent will be calling to schedule a pre-plaster walk-thru with you. Now is the time to cleanup any questions you may have – and it is especially important to square them away. We are about to enter to final phase of construction, but before we do, we want to be sure everything is satisfactory to this point.
PLASTER
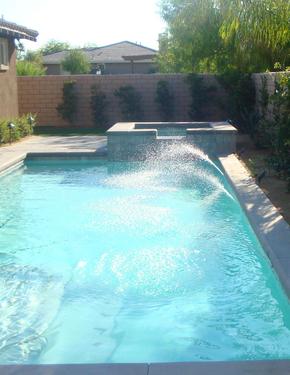
Now we are about home free! Plastering is another art form. They use state-of-the-art wheelbarrows, buckets and trowels! They initially work in the wet plaster while wearing “platform” shoes with spikes, then as the plaster hardens, they graduate to wearing sponges taped to their shoes.
Notice the uniform bright white finish. We take all precautions to keep it what way, but again, it is a natural product out of the earth and sometimes it has a mind of its own. It will take over three weeks to cure and the white plaster will darken some during the process. All plaster will mottle (some variation in color) like your concrete decks – they are both cement products. Every pool is different and there is no way to predict or prevent some mottling.
The plasterers will start filling the pool before the leave. The pool should be filled as fast as possible, so round up at least two hoses – especially if you have low water pressure. It will take approximately 15-24 hours to fill but DO NOT STOP THE WATER FLOW until the water reaches the center of the tile line, otherwise you’ll end up with a permanent “ring around the pool”. If you get concerned that the water might overflow during the night, simply reduce the flow rate and set your spouse’s alarm to check it out! If you’ve chosen pebble, the water is not added until the material is acid washed, usually the day after.
Homeowner:
START-UP
The pool equipment will be started up as soon as the pool is filled. Instructions on operation will be given at that time or the next day, depending on your availability. We usually run the pumps for the first 24 hours or until the water clears up.
Again it’s time for your muscle power. The plaster should be brushed – every square inch – 2 to 3 times per day or more until the “plaster dust” disappears, usually within a couple of days. Then brush it once a day until the first week is up. This helps keep the plaster surface smooth and free of calcium deposits. The brushing is even more critical with gray plastered pools. Pebble pools need minimal brushing.
MAINTENANCE
Use the instructions in the chemical test kit that we provide to learn about proper water treatment. PROPER WATER CHEMISTRY IS THE MOST IMPORTANT FACTOR IN MAINTAINING THE BEAUTY AND FUNCTIONING OF YOUR POOL. Only one miscue can have lasting effects on your plaster and equipment.
CONCLUSION
You are undertaking a major construction project and have probably heard some real horror stories about building a pool – but in this case you have selected the most capable team to accomplish the project. One that is dedicated to making this an enjoyable process. So sit back and watch it happen!